3D printed EEG electrodes!
February 16, 2015
I spent the day messing around with 1.75mm conductive ABS BuMat filament, trying to create a 3D-printable EEG electrode. The long-term goal is to design an easily 3D-printable EEG electrode that nests into the OpenBCI “Spiderclaw” 3D printed EEG headset.
I decided to try to make the electrode snap into the standard “snappy electrode cable” that you see with some industry-standard EMG/EKG/EEG electrodes, like the one seen the picture below.
After some trial and error w/ AutoDesk Maya and a MakerBot Rep 1, managed to print a few different designs that snap pretty nicely into the cable seen above. At first, Joel (my fellow OpenBCI co-founder), and I we’re worried that the snappy nub would break off, but, to our pleasant surprise, it was strong enough to not break with repeated use. Though the jury is still out since we’ve only repeatedly snapped for 1 day.
Here you can see a screenshot of the latest prototype design in Maya. I added a very subtle concave curvature to the “teeth” on the underside of the electrode so that the electrode will hopefully make better contact with the scalp.

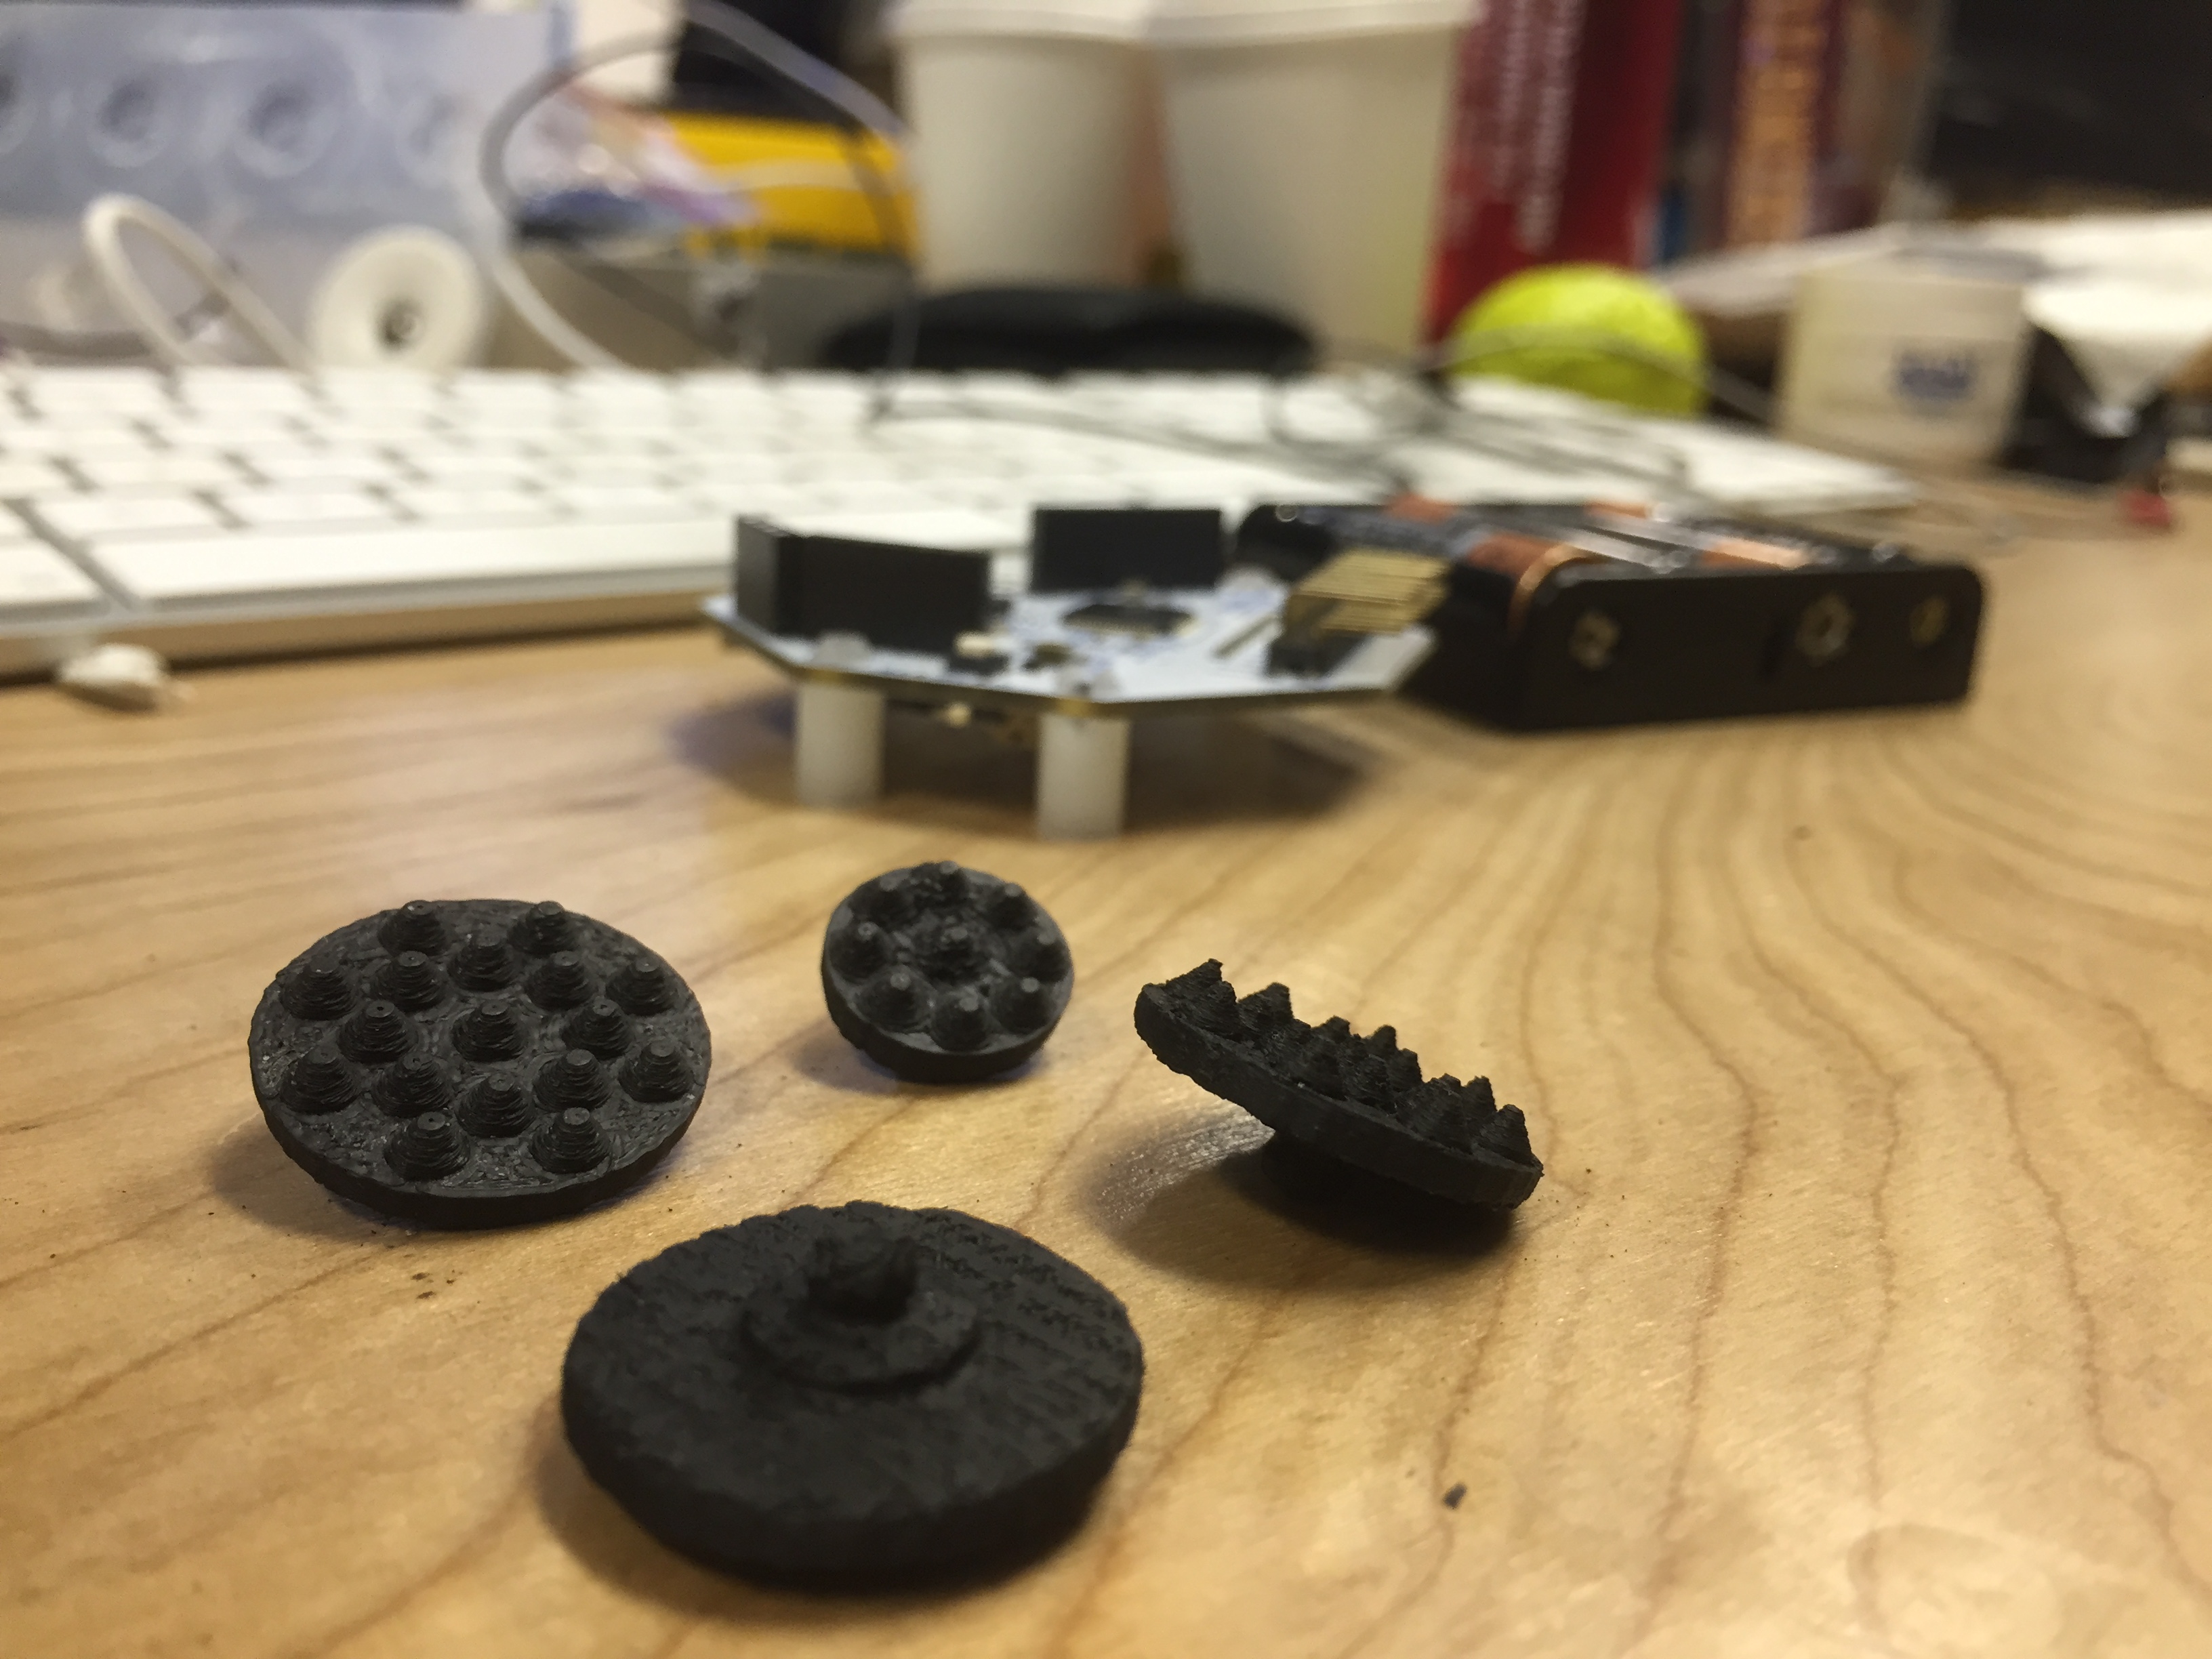
Here is a photo of a few different variations of the electrodes that we’re actually printed over the course of the day.

I’d like to note that I printed each electrode upside-down, with the pointy teeth facing upward on the vertical (Z) axis, with a raft and supports, as seen in the picture below.
I tested each of the electrodes with the OpenBCI board, trying to detect basic EMG/EEG signals from the O1/O2 positions on the back of the scalp—over the occipital lobe. I tried each electrode with no paste applied—simply conductive filament on skin. And then I tried each electrode with a small amount of Ten20 paste applied to the teeth. To my pleasant surprise, without applying any conductive Ten20 paste, I was able to detect small EMG artifacts by gritting my teeth, and very small artifacts from Alpha EEG brain waves, by closing my eyes. Upon applying the Ten20 paste, the signal was as good (if not better) than the signal that is recorded using the standard gold cup electrodes that come with the OpenBCI Electrode Starter Kit! Pretty awesome!
Here’s a screenshot of some very faint alpha (~10Hz) that I was able to pick up without any Ten20 paste applied to the electrode, with an electrode placed over the O2 node of the 10-20 system!
And here’s a screenshot of some very vibrant alpha (~10Hz) that I was able to detect with Ten20 paste applied to the 3D-printed electrode!
The signal looks pretty good. Joel may begin messing around with an active amplification hardware design that works with the any 3D-printed snappy electrode design.
In case you’re interested in printing your own, here’s a link to the github repo with the latest design of the electrode!
More on this coming soon!


William J. Croft - February 18, 2015 at 4:24 pm -
Conor, very cool. Left a comment for you over on the related forum thread, http://openbci.com/forum/index.php?p=/discussion/comment/1654/#Comment_1654
Can you measure using your multimeter, the ohms resistance between the snap connector and one of the points on the front of the comb? When I was looking around at conductive filaments, saw some with very high resistance, and others with relatively low, 10K ohms. If yours happens to be the megohm variety, it would probably perform differently than the 10K version. Usually lower ohms would give better contact.
Cheers, William